
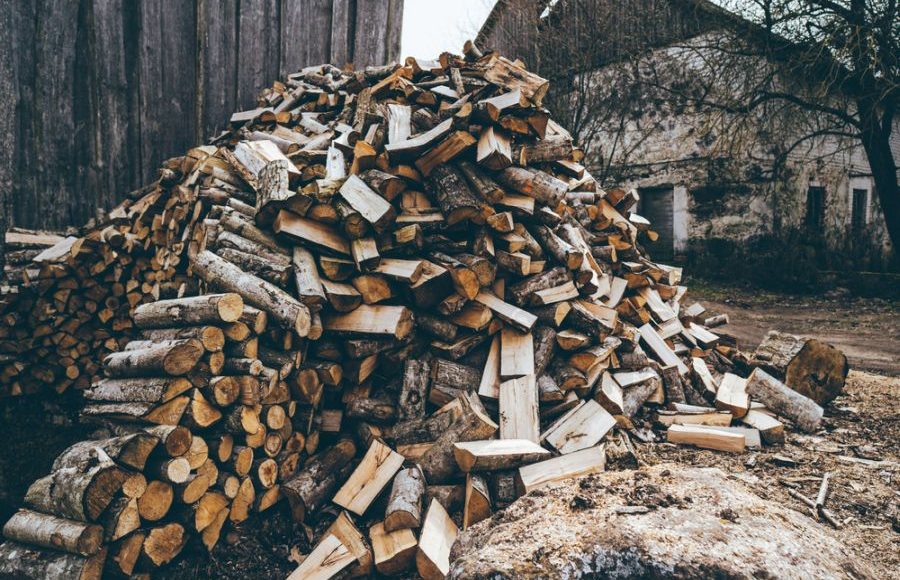
Wood was humanity’s first source of fuel, and even today, it’s one of the most reliable resources in many parts of the world. The usage of this fuel source varies from one culture to another, and the various geographic regions have influenced how firewood is managed, from hewing to heating.
There are many things you need to learn about using firewood for heating your home, and the first thing one needs to acknowledge is that no wood is equal when it comes to its heat value. The heat output is measured in BTUs (British thermal units), and it can be described as the amount of heat generated to raise the temperature of 1 pound of water by 1° F.
Starting with the basics
Most folks will usually buy wood for heating their homes, and they generally get a mix of hardwoods. Hardwoods are the best type of wood in terms of heat efficiency. They burn cleaner and have a better BTU output compared to softwoods. It is estimated one cord of hardwood can produce as much heat as the equivalent of 150 to 250 gallons of fuel oil.
Even if there’s no doubt that hardwood is much better to be used for heating purposes, there’s also a hierarchy within the class that should be acknowledged, and the various species of hardwood have different BTUs.
In general, if you want to control the heat output, you should control the species of wood you buy to feed your stove. In some cases, this means you have to cut your own firewood.
Regarding the firewood acquisition, you can buy wood by the cord or face cord. The size of a cord measures 4 feet by 8 feet, and each piece of wood is 4 feet in length. As for the face cord, the size is similar, measuring 4 feet by 8 feet, but the size of the wood pieces varies from 12 to 32 inches.
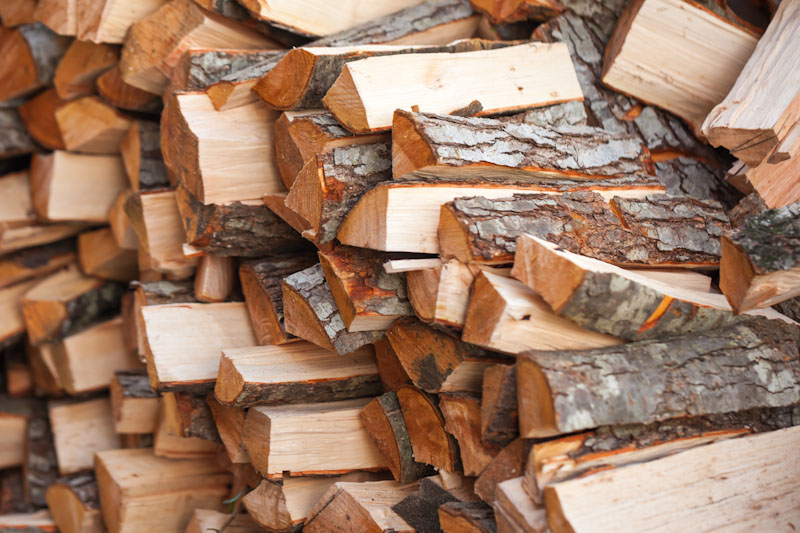
If you decide to buy firewood, you have to examine it carefully. For example, seasoned wood is noticeably lighter than greenwood, and it has those specific cracks at the ends. These cracks occur only when the wood shrinks after drying for a considerable amount of time.
One trick I’ve learned to differentiate seasoned wood from green or “almost seasoned” wood is to knock two pieces together. If they give out a high-pitched, hollow sound, then it’s clear I’ve got the suitable lumber. If they give out a dull thunk sound, then it means the logs are wet, and I need to look somewhere else.
Getting your own firewood
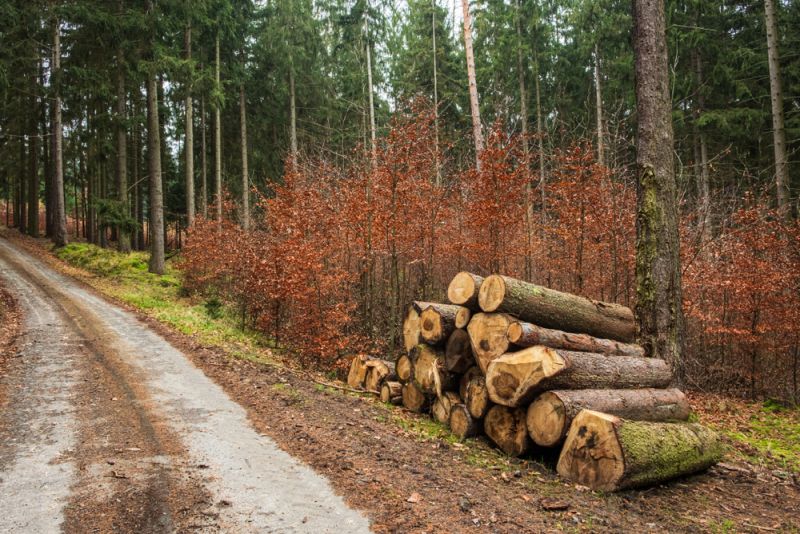
As I said previously, an alternative to buying wood is scavenging and cutting your wood. If you decide to scavenge firewood, stay away from construction sites since the wood they’ve used might be laced with all sorts of poisonous chemicals, and it’s not suited for burning. Other than that, pretty much anything goes as long as the wood is not treated with paint or chemicals.
If you have your own woodlot and you’re culling trees from your property, you should resist the urge to cut the straight trees. Most folks go for these trees because they are easier to split. However, it’s recommended to bring down the misshapen or crooked trees that grow under the canopy of other trees, and you should also go for the wolf trees.
If you wonder what wolf trees are, these are the tall forest trees with a large girth and big spreading branches that prevent other trees from growing. A wolf tree is surrounded by smaller trees that have a hard time developing due to the large canopy covering them.
Culling these trees is recommended because it will give the other trees a better chance of developing, and your woodlot will get healthier and faster-growing trees. They will be worth more than the misshapen trees, producing more firewood.
Cutting and splitting recommendations
If you’re going for felled or scavenged logs, you should cut them into a crosswise section (called rounds). You can split the rounds when you get the chance, but it’s recommended to split them right away while they’re still wet. It makes splitting much easier and provides more drying time for the wood. Each round you split should be 16 inches in length to fit into the average stove.
If you have logs with a smaller diameter, use a sawbuck to make your life easier. If you’re dealing with larger logs, you should cut these on the ground. Start by cutting most of the way into the log, roll the log half a turn, and then cut all the way through.
Pay attention and avoid touching the ground with your chain because it will get dull in no time, and you will have to sharpen or swap it to continue cutting the wood. Also, in some cases, you will need to use a cant hook or a peavy to roll the log with ease.
If you plan on splitting logs regularly and you depend on firewood for heating your home or if you’re selling the wood, you should get a gas-powered splitter since such a tool becomes indispensable. However, if you’re dealing with ten cords or less per season, all you need to do is get an 8-pound splitting maul, a splitting block, have some spare time, and be physically able to do the job.
I never bother splitting logs that are less than 3 inches in diameter, and for everything between 3 and 6 inches in diameter, I just cut them in half. If I have logs up to a foot in diameter, I cut them into quarters, and for anything more significant than that, I split triangles from the center of the log and then cut those into pieces that fit into the stove.
Storing the firewood
Contrary to popular belief, the firewood is not neatly stacked for aesthetic purposes, and there’s a more practical reason behind stacking the firewood in a certain manner. The form must follow function, and the way you stack your firewood should facilitate its drying. The best form for stacking firewood is the New England method, so here’s how to do it:
- Start by separating the firewood from the ground. You will need to provide a ground cover that provides at least 5 inches of space from the ground. This will prevent moisture from being sucked by the wood, allowing air to circulate into the firewood stack. You can use wood pallets as a foundation.
- Place the wood pallets anywhere on your property, but keep in mind that the area you pick for storing your firewood should incorporate a few key factors. It should get a fair amount of sunlight. It should not be completely sheltered from the wind. It should be located in a place that’s readily accessible for getting the wood faster and moving it inside with ease. And most of all, the location should have an overhang cover that protects the wood from the elements.
- Avoid doing it in parallel rows when stacking the wood and use a cross-pattern of courses on the pallets. As you build up, each row of wood needs to be perpendicular to the one beneath.
You’re aiming for structural integrity when building up, but the idea behind the cross-pattern is to expose as much wood surface as possible to sun and wind. Such structure will assure maximum airflow, and it will allow warm air to rise through the slats of the palettes up into the stack.
Since up to 50 percent of the wood is water, drying your firewood becomes a critical task if you’re aiming for maximum heating efficiency. If you’re burning wet firewood, the water boiling off is nothing but wasted energy. Even more, wet wood produces excess smoke, and it reduces the burn efficiency by as much as 25 percent.
When drying wood, you should aim for wood with less than 20-percent water. The best way to figure out how dry the wood requires a wood moisture meter. In general, it takes between 6 months and one year to dry the wood to that level of dryness, depending on the region you live in.
Besides providing better heat efficiency, dry wood is also easier to carry, it ignites easily and produces less smoke, making it less likely to line the chimney with creosote.
Burning firewood efficiently
When you start the fire in your woodstove, you want it to be small and hot at first. In the beginning, there will be a good amount of smoke emanating from the chimney, but as the fire becomes hotter, there will be no more smoke and just heat waves emanating from the top of the chimney.
When the fire is burning steadily, you can close the stove door completely and set the dampers. Proper draft adjustment is achieved depending on the stove you’re using (since every stove is different) and only after a decent amount of trial and error.
When the stove is lit, open the door about half an inch and make sure the drafts are wide open. When you notice the stove is getting hotter and there’s no more smoke emanating from the top of the chimney, you can fill the stove box and shut the door completely. You should leave the draft open for a few more minutes (10-15 minutes) and begin closing it gradually.
Make sure you watch the fire as you close the draft gradually and don’t allow it to smolder. The fire can get lower as you close the draft, but it shouldn’t be allowed to smolder. Before going to bed, you can add one or two large logs into the stove, but make sure the draft is slightly open just enough to maintain a low flame.
Regarding the burning time, this depends on the logs you are using, and while smaller logs are good for starting the fire, larger logs should be used for a continuous burn. I’ve noticed that if I pack the logs tightly in the stove, they burn longer.
Smoke problems
Some folks will inadvertently deal with smoke when using their stove, and the main reason that causes the back-puffing of smoke into the room is the temperature of the chimney. To put it simply, if the chimney is cold, the air inside it will also be colder. If you haven’t started a fire in the stove for a while, or if there’s too much time passing between fires being lit in the stove, there will be a column of cold air forming in the chimney.
Once you light the fire, the cold denser air will block the warmer air that carries the smoke from rising, and you will experience back-puffing. The solution to this issue would be to light the new fire as quickly as you can and prevent the residual heat from the night’s fire from getting cold, or you can heat the air in the chimney using whatever method you like.
I’ve often used balled-up paper to heat the chimney on cold mornings. I ball up newspapers and impale it on the end of a long poker. I light it up and shove the poker up the flute. This works most of the time, but it also depends on how cold the weather is.
Picking a stove
A good stove makes all the difference, and contrary to popular beliefs, bigger is not better when it comes to picking your stove. Marketing trends will have you believe otherwise, but a smaller stove is much more efficient than a larger one since the larger the stove, the more heat will be produced, which may lead to too much heat being produced for the given area.
This means that those with a large stove have to burn their firewood at a smolder. In time this will lead to creosote buildup and firewood waste. For example, you should calculate the BTU output of your stove to cover the size of your home.
In my case, for our cabin, which is roughly 1,000 square feet, I’m using a 40,000-BTU stove. If I needed to heat a house that has double the size, I wouldn’t double the size of the stove, and I will probably get a 60,000-BTU stove.
Picking a stove can be quite tricky, and many other factors should also be considered. However, don’t believe that “the bigger the stove, the better” trend since you’ll waste money and firewood if you pick a big stove.
Concluding
Wood burning remains a safe bet for heating your home even nowadays, with many other fuel options available. It’s still one of the most efficient ways to heat your home during the colder months. It all starts with wood management, and hopefully, this article will help you better heat your home this winter.


william britt | January 3, 2022
|
All very good information for anyone considering using wood as a heat source. I do not see any pushback on one item and am glad to see it, but Wolf Trees are commonly revered by those that believe anything old is old growth, a lack of understanding of the principles behind a healthy and renewable forest. Thinning once the smaller trees are healthy enough to stand and grow and eliminating the crowding that mother nature corrects with fire and the natural death cycle of trees comes into play with the forester helping things along as well as mitigating the less desirable growing conditions for future harvesting. Some of our finest evergreen logs of older fir and pine trees in the Pacific Northwest have yielded some of the best lumber and firewood. The protection and ignorance of not allowing a natural burn and thinning process, and logging /harvesting assisted, as well as putting out every fire for the last century has led to catastrophic fires that leave nothing behind and many of the areas never produce again.
John | January 3, 2022
|
Do you want to have plenty of coals to get the morning fire going?
I’ve found an easy way to get a fire to burn all night and have plenty of coals the next morning’. My stove is rated for a 2,200 square foot space. I usually set the all-night fire by 9:30 pm..
It’s simple and easy to do.
You can experiment with your stove, because there are a multitude of wood stoves on the market.
First thing. you’ll need seasoned hardwood of some kind.
1.) In the evening time half an hour before bed you’ll need to let your fire burn down to where there is a small amount of coals.
2.) Rake all the coals to one side of the fire box. (the smaller the amount of coals you have, means, you will have more coals in the morning to work with)
3.) On the side where there is no coals, place the biggest piece of seasoned wood you have that will fit. ( in the midwest, that would probably be oak and here in the northwest where I live, that would be Tamarack or Red fir) This is the KEY, to having your fire last all night.
4.) then add other hard wood to fill the rest of the fire box and close the stove up tight and that’s it !!!
Try it and see if it works as good for you as it does for me.
Chuck Leubecker | January 4, 2022
|
Great artical!
A few years ago someone advised me to put a damper in the flue and leave the air intake wide open. I have been burning wood for over thirty years and always regulated the air intake. After making the change my stove produces more heat and so does the flue pipe! Another in positive is that an most in of the creosote in forms in the flue in pipe in and not in the chimney which makes cleaning easier.
Weston Millward | December 27, 2022
|
Good article, I enjoyed reading it….
Doug | December 28, 2022
|
I’ve heated two homes and various buildings with wood for over 55 years. In that time I’ve gone through more wood than most people will in an entire lifetime. And I’ve learned some tricks to increase burn time and get more heat out of lesser amounts and lower quality wood.
Also there are things you can do to slow and/or remove creosote from chimneys. One is using TSP Tri-Sodium Phosphate on low fires frequently.
I currently operate different three stoves in separate buildings and the best stove I’ve owned is almost 55 years old yet still works like new.
Most of the newer “approved” designs can’t begin to heat as well as the old Atlanta Stove.
Unfortunately the company is no longer in business.
A great book I got many years ago is Poulan’s Complete Book of Firewood by Warren Donnely.. It gives BTU ratings for various wood types and other excellent information
Kevin B | February 5, 2023
|
I’ve been searching everywhere and can’t seem to find a clear answer: what is the most efficient size to split firewood? Intuitively, I think smaller is better because it gets hotter faster, but my brother swears by logs as big as 20″ just spilt in half…
To clarify: what size will you get the most heat into your home per amount of wood used?
Doug | February 6, 2023
|
The answer depends on the type and size the firebox, the type of wood you are using and the burn time desired.
Experiment and note what works best per situation. You may not want a long burning fire at certain times of the year.
Just enough to get you to the warmer part of the day saves on fuel.
And speaking of fuel, you might want to try layering wood with paper – up to 2 inches thick – to slow the burn and stove moderate temperature.
Some nuts and fruit pits work nicely to make fires even hotter – be careful – some like aged black walnuts get super hot. Start with smaller amounts.
I currently use three different types of units (fire box designs) and each one has its quirks.
The one in my shop has a deep firebox and can burn up to 12 hours with 10 in diameter logs; the biggest that will fit through the door.
The smallest will only allow a 6 in but all three burn rounds – un-split the longest as long as they are placed over coals.
Hope this helps.